Risk Assessment Roles
How to create and manage the roles used to sign off risk assessments
Contents
- 1. Introduction & Context
- 2. Key Features & Functions
- 3. Requirements
- 4. Step-by-Step Guide
- 5. Common Issues & Troubleshooting
- 6. Related Articles
1. Introduction & Context
Risk assessment roles define the roles that users can select when signing off a risk assessment, so your sign-off process reflects the people responsible for each assessment. This article explains how to create and manage these roles in the admin area.
Risk assessment roles are part of the Risk Assessment module, a versatile module in Clew that lets you track JSA (Job Safety Analysis) and SWMS (Safe Work Method Statements) and link them back to your safety and risk modules for a complete picture. Each role you create in the admin page becomes available for selection when end users operate the Risk Assessment module.
Who is it for? System administrators who configure the Risk Assessment module and control the roles available during sign-off.
What does it impact? The roles you create determine the options end users see when signing off a risk assessment. Disabling a role removes it from selection without deleting the existing records that used it.
2. Key Features & Functions
- Sign-off roles: create the roles used in the risk assessment sign-off process, so each assessment records who is responsible.
- End-user selection: every role created in the admin page becomes selectable within the Risk Assessment module.
- Multi-language support: where multiple languages are enabled, you can enter a role title for each available language.
- Enable or disable roles: turn roles on or off with a toggle, and edit them at any time.
3. Requirements
- System Administrator access is required to configure risk assessment roles through the admin area.
- The Risk Assessment module must be enabled to use risk assessment roles.
4. Step-by-Step Guide
Creating a Risk Assessment Role
- Go to Admin, then Risk Assessment Roles. This opens the admin page listing any existing roles, or a blank page if none exist. Click Add to create a new role.
- Enter a Title for the role. This title is what end users see when selecting the correct role in the Risk Assessment module. If you have multiple languages enabled, a title field is shown for each available language.
- Click Save.
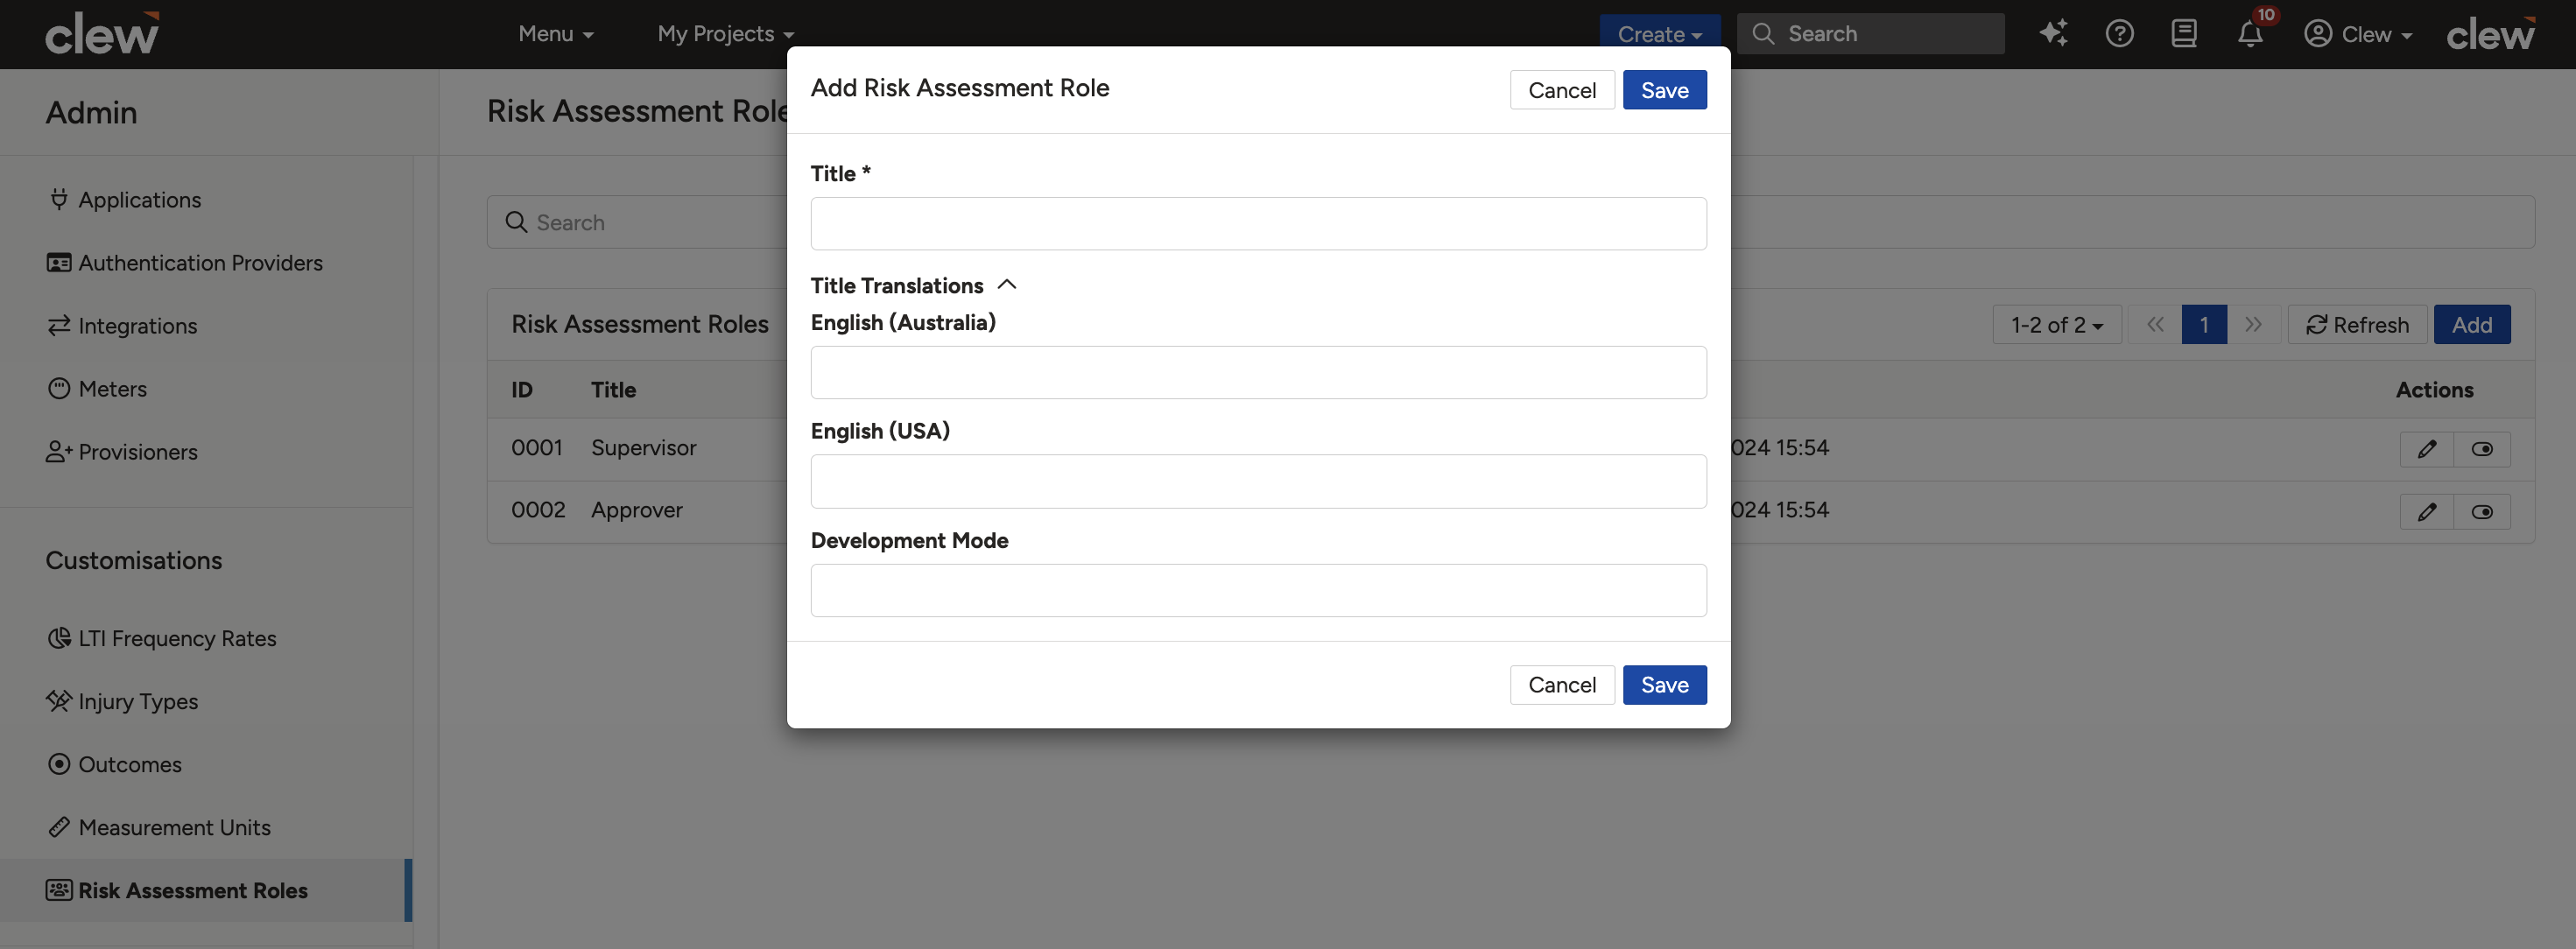
Creating a new risk assessment role.
Repeat these steps until you have created all the roles you need.
Editing or Disabling a Role
To disable a role, click the toggle button on its row, as shown below. From the same page you can also edit existing roles.
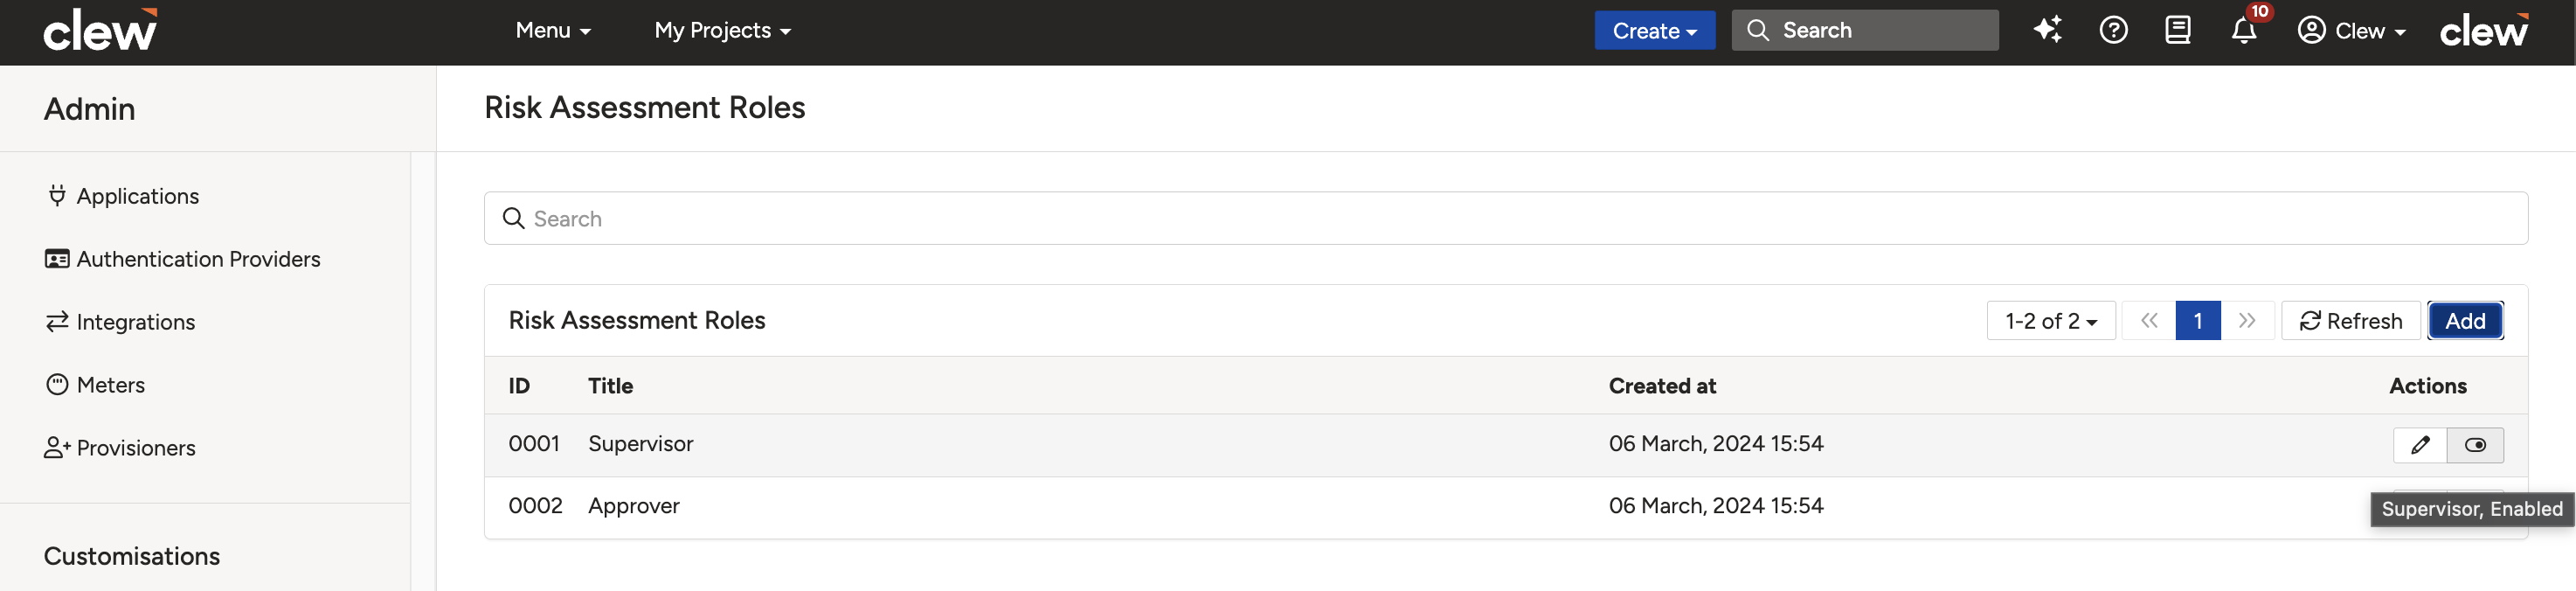
Editing or disabling a role from the roles list.
5. Common Issues & Troubleshooting
| Issue | Likely Cause | Solution |
| The Risk Assessment Roles page is not available under Admin | The Risk Assessment module is not enabled, or you do not have administrator access. | Confirm the Risk Assessment module is enabled and that your account has System Administrator access. |
| A role does not appear for end users during sign-off | The role is disabled, or was not saved. | Open Admin then Risk Assessment Roles and confirm the role is enabled via its toggle. |
| A role title is missing in another language | A title was not entered for every enabled language. | Edit the role and complete the title field for each available language. |
Best practices:
- Use clear, recognisable titles that match how your teams refer to each sign-off role.
- Disable roles that are no longer needed rather than trying to remove them, so historical records remain intact.
- Complete the title for every enabled language so all users see a consistent set of roles.
Click a title to preview it here. Use the Open full article button to read the full version in a new tab.
▾Indicator Outcomes Open full article »
Related article
How to create colour-coded indicator outcomes and assign them to indicator thresholds.
Was this article helpful?
That’s Great!
Thank you for your feedback
Sorry! We couldn't be helpful
Thank you for your feedback
Feedback sent
We appreciate your effort and will try to fix the article