Links
How to create and manage custom links in the Clew Platform
Contents
- 1. Introduction & Context
- 2. Key Features & Functions
- 3. Requirements
- 4. Step-by-Step Guide
- 5. Common Issues & Troubleshooting
- 6. Related Articles
1. Introduction & Context
Custom Links let you add navigation shortcuts to the Clew Platform, pointing users to internal platform pages or external resources from menus, dashboards, and other areas of the interface.
Internal and external links work in the same way. The key difference is the destination: internal links point to a page within the Clew Platform, while external links point to a resource outside it. In both cases, make sure the destination is accessible to the users who will see the link.
Who is this for? System administrators responsible for configuring the Clew Platform.
What does it impact? Links appear in specific areas of the platform determined by the Link Type you select. Once enabled, they are visible to the Teams you have assigned. Links cannot be deleted; they can only be enabled or disabled.
2. Key Features & Functions
- Internal and external destinations: Links can point to any URL, whether that is a page within the Clew Platform or an external resource such as a policy document or external system.
- Seven link types: Each type places the link in a different part of the interface: Add Modal, Create Menu, Generic, Help Menu, Main Menu, Mobile Menu, and User Menu. See the Link Types Reference in Section 4 for details.
- Team-based visibility: Assign a link to one or more Teams so only the relevant users see it.
- Register scope: Restrict a link to specific registers so it only appears in the relevant context.
- Display order: Control the position of each link relative to others of the same type using the Position field.
- Icon and colour: Customise the appearance of a link with an icon and colour to make it visually distinct.
- Enable/disable: Toggle links on or off without deleting them. Links cannot be permanently deleted.
3. Requirements
- System administrator access to the Clew Platform.
- The destination URL for the link (internal or external).
- An understanding of which area of the platform the link should appear in, so you can select the correct Link Type.
- If you are creating a Generic link to use in a dashboard widget, the dashboard must already exist. See the Link Types Reference in Section 4 for the full Generic link workflow.
4. Step-by-Step Guide
Creating a Link
- Navigate to Admin > Links. This page displays a table of all existing links in your platform.
- Click Add to create a new link. The Add Custom Link form will open.
- Complete the form using the field descriptions in the table below, then click Save.
- If your platform is configured for multiple languages, use the Title Translations section to add translated titles for each language.
Add Custom Link form fields:
| Field | Description |
| Title (required) | The label users will see when they encounter the link. Also used to identify the link in the Admin links list. |
| Link URL (required) | The destination URL that users will be redirected to when they click the link. |
| Link Type (required) | Determines where the link appears in the platform. See the Link Types Reference below for details on each option. |
| Position | Controls the display order of links of the same type. For example, if you have two links in the Create Menu, Position determines which appears first. |
| Register Scope | Restricts the link to specific registers. Only users working within the selected registers will see this link. |
| Open in a new tab | When set to Yes, clicking the link opens the destination in a new browser tab. |
| Icon and color | Customise the visual appearance of the link with an icon and colour. |
| Teams | Assign the link to one or more Teams. Only users in the selected Teams will see this link. |
| Add Modal Settings | Only applies when Link Type is set to Add Modal. Specify which custom record types can be created from this link. |
Link Types Reference
The Link Type field determines where the link appears in the Clew Platform. The table below describes each type and shows an example of where it appears.
| Link Type | Where it appears and example |
| Add Modal | Appears on the Create button as a modal option. Use the Add Modal Settings field to specify which custom record types can be created from this link. 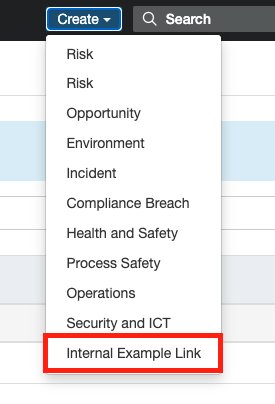 |
| Create Menu | Appears in the dropdown on the Create button. 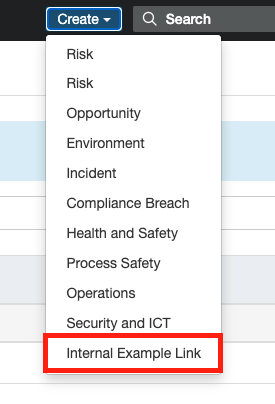 |
| Generic | Used to create a dashboard widget that holds and displays the link. To set this up:
|
| Help Menu | Appears in the help menu, accessible via the question mark icon in the top-right corner of the platform. 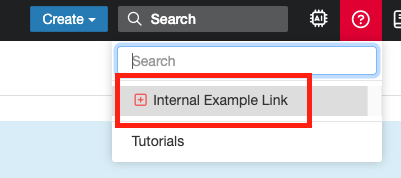 |
| Main Menu | Appears in the main navigation menu dropdown. 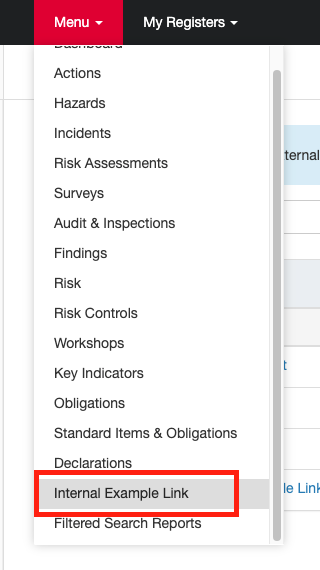 |
| Mobile Menu | Appears in the menu list when users log in via the Clew mobile app. 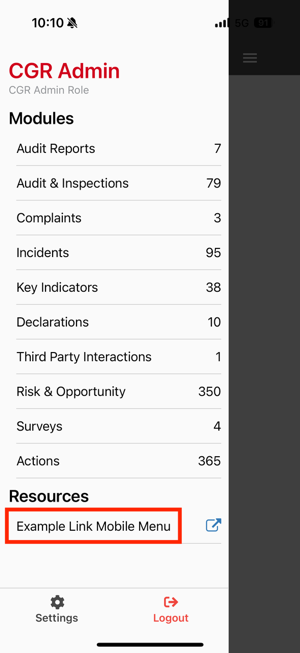 |
| User Menu | Appears in the user dropdown menu. 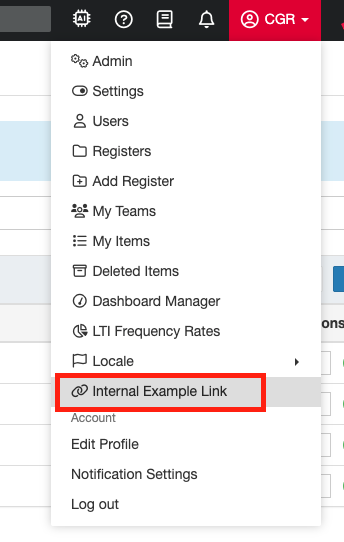 |
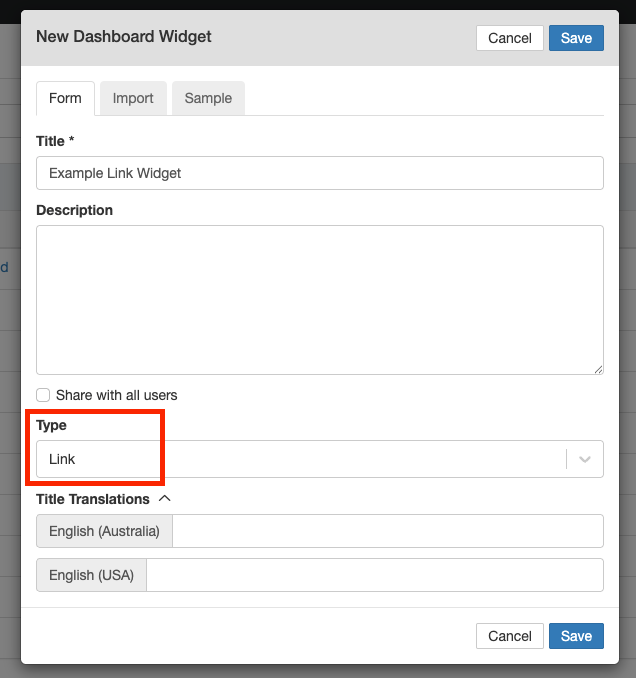
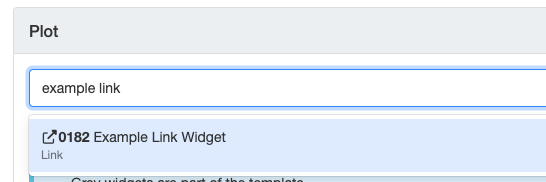
5. Common Issues & Troubleshooting
| Issue | Likely Cause | Solution |
| The link is not visible to users | The link is disabled, the wrong Link Type was selected, the user's Team is not assigned, or the Register Scope excludes the register they are working in | Check that the link is enabled. Confirm the Link Type is correct for the expected location. Verify the user's Team is selected under Teams. Check the Register Scope setting. |
| The link appears in the wrong area of the platform | The incorrect Link Type was selected when creating the link | Edit the link and change the Link Type to the correct option. Refer to the Link Types Reference in Section 4 to confirm the right type for each area. |
| Cannot delete a link | Links cannot be permanently deleted; this is by design | Disable the link instead. A disabled link is hidden from all users but remains in the Admin links list in case it is needed again. |
| Generic link widget is not showing on the dashboard | The widget may not have been created or placed on the dashboard, or the link may be disabled | Confirm the link is enabled. Check that a widget of type Link has been created and placed on the correct dashboard. See the Generic link steps in Section 4. |
Best practices:
- Use clear, descriptive titles so users immediately understand where a link will take them.
- Always assign links to specific Teams rather than leaving them visible to everyone, unless the link is genuinely relevant to all users.
- Test every link after saving to confirm the URL is correct and the destination is accessible to the intended audience.
- Use the Position field to keep related links grouped and in a logical order, particularly when multiple links appear in the same menu.
- Disable rather than ignore links you no longer need. A tidy links list makes administration easier over time.
Click a title to preview it here. Use the Open full article button to read the full version in a new tab.
▾Get Started With Images Open full article »
Related article
Get Started With Images explains how to upload, insert, and manage images in the Clew Platform, so you can add visual context to your records and dashboards.
Was this article helpful?
That’s Great!
Thank you for your feedback
Sorry! We couldn't be helpful
Thank you for your feedback
Feedback sent
We appreciate your effort and will try to fix the article